Cloth Setup - Unreal
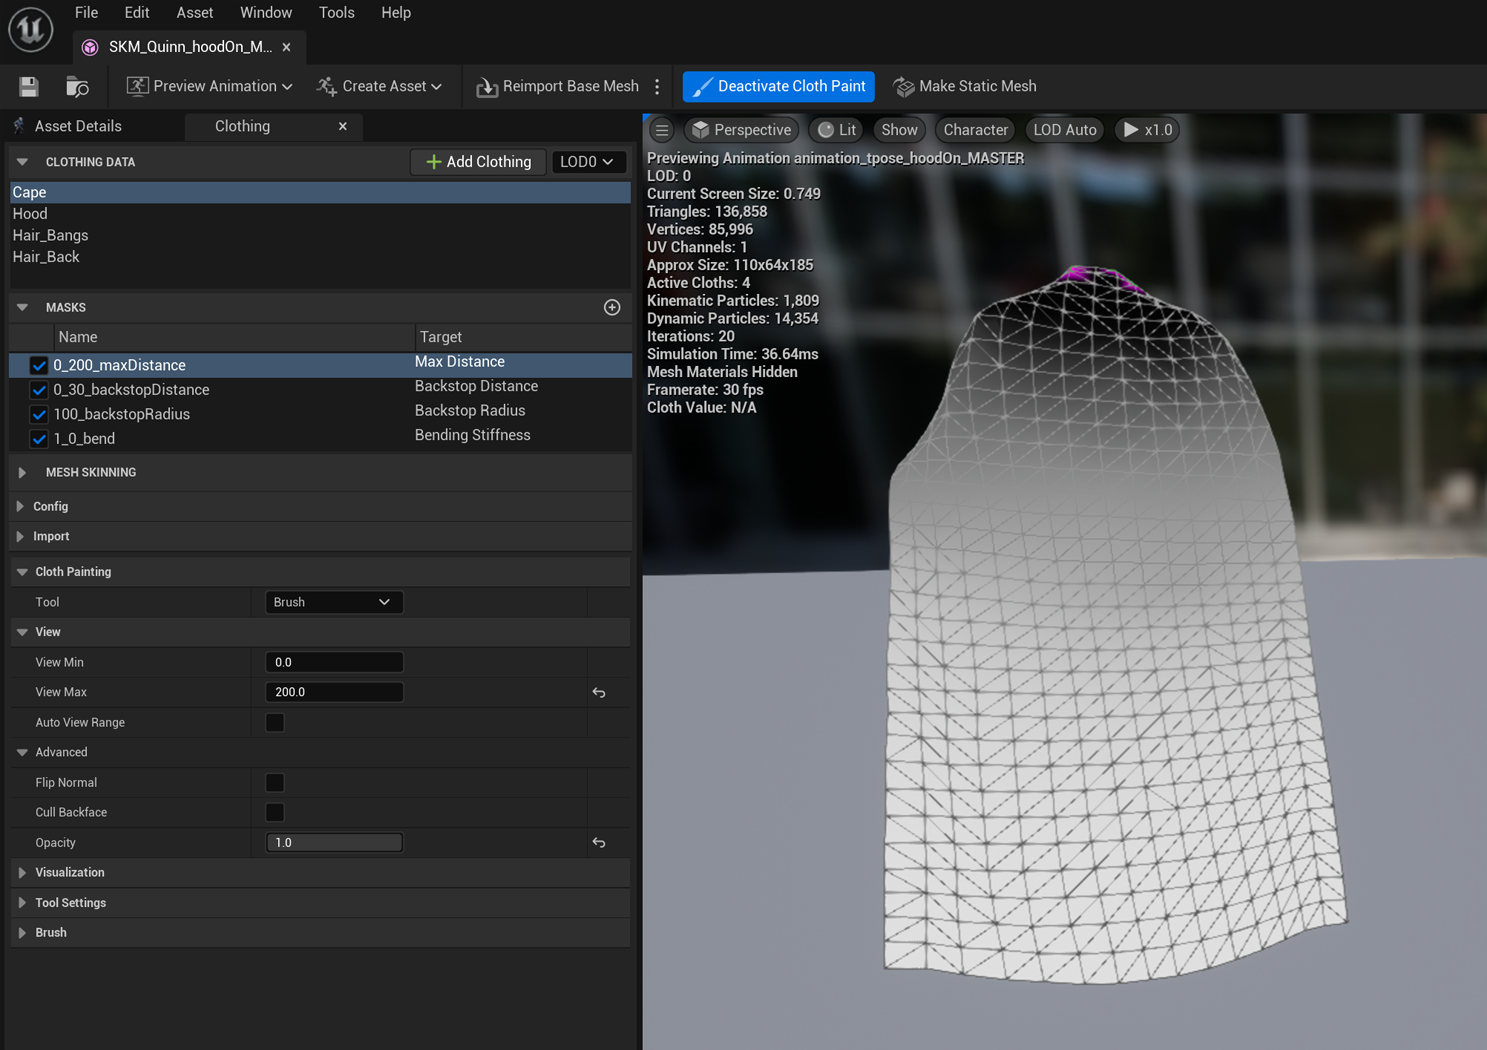
After importing the rig into Unreal, I then assigned the sim mesh geo as cloth objects and then assigned the cloth properties to the render geo. This is the order of selection that allows the render geo to bind to the low res sim mesh. After assigning the cloth objects, I then painted the max distance setting which controls how far each vert can move away from the skinned mesh. A setting of 0 causes the full rig to drive the vert, no simulation is calculated. A setting greater the 0 allows the vert to sim based on how far you set your max distance.
Other properties to be aware of are the backstop distance, which keep the cloth from going past the skinned cloth opposite of the normal. This comes in handy for things like the hood, where I want the sim to not pernitrate the head of hair. If I set the backstop to a very low value, the hood can't go below the skinned mesh which would cause a lot of noticeable IPs with the hair underneath. The hood however can move away from the skinned mesh in the normal direction which gives it enough range of motion.

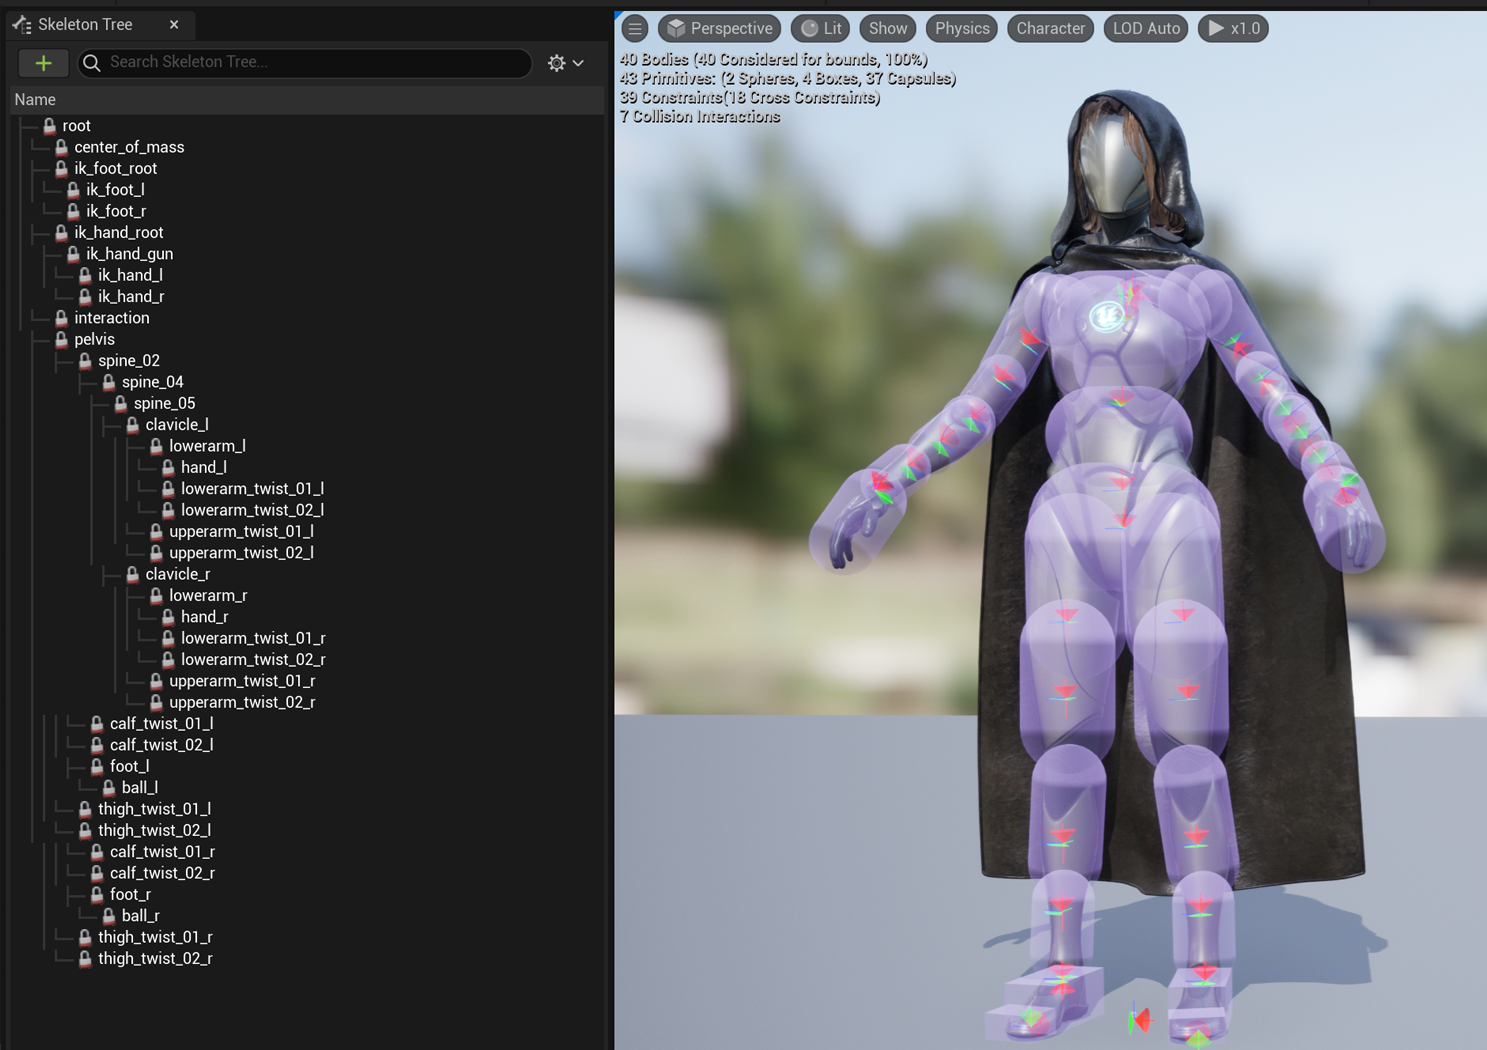
Once I setup the initial cloth settings, I then needed to make sure my skeleton had proper physics colliders. The most optimal approach is using capsules that are attached to the bones. What's nice about Chaos use of physics assets is you can assign each cloth object to it's own isolated set of collision capsules. This comes in handy when you need to fake multi-layer clothing collisions. A great example of how I used this is if you look at the image below, this was the collision set for the cape. For the hood, I ended up only adding a collision for the head and neck. I also added a slight thicker collision for the shoulder to prevent the hood from interpenetrating the cape underneath. For the hair, I did something very similar but also added collisions capsules for the sides of her head. This prevented the hair from interpenetrating the hood.

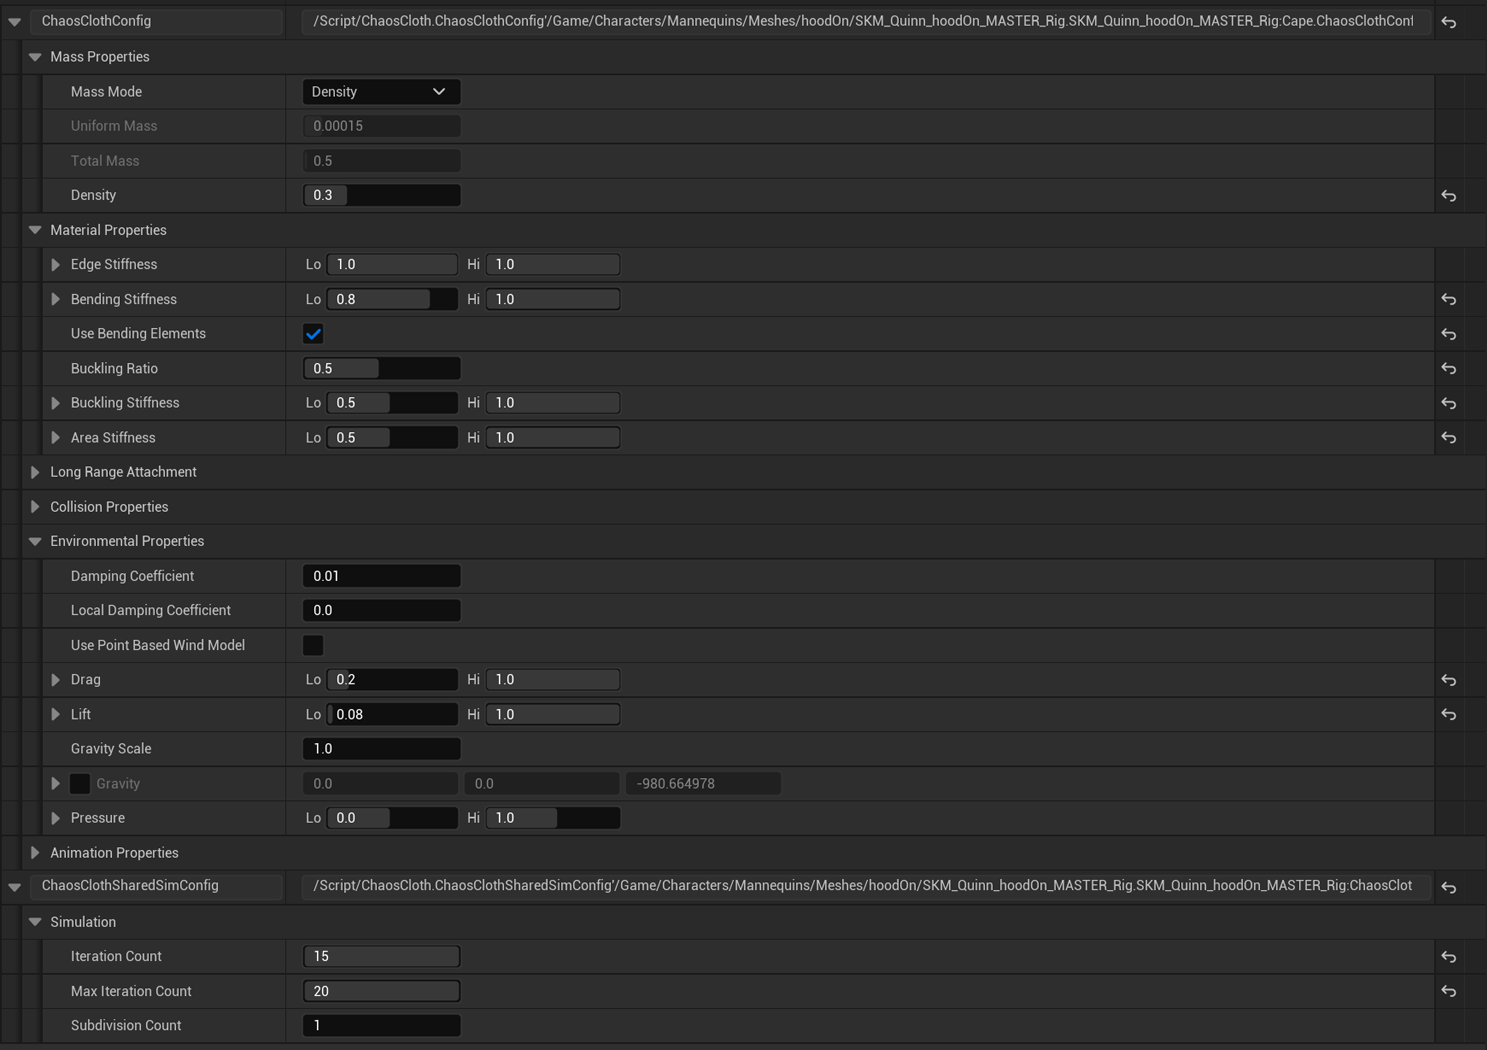
Here is a view of the settings that I ended up applying to create the cape. Overall these settings gave me the look I was after. I needed something that looked heavy and resisted bending much like you would see in a leather material. To achieve this, I set my bend stiffness high and activated the "Use Bending Elements" checkbox. This gave me access to the buckling stiffness, which comes in handy if you find your cloth pinches between itself. Since we aren't using self collisions for performance sake, the buckling stiffness prevented a lot of issues for me.
Other important settings I found were to crank up the "Iteration Count". Without this, I noticed I wasn't getting as good of collisions with the body. When the character was running, her arms would always go through the back of the cape. Adding more Iteration Count helped with this. Also, I want to mention that making sure you set your Density, Drag and Lift to just the right values will allow your cloth to react accurately to wind and when the character moves through space. Playing with these settings took a bit of experimentation. What you want to do is make sure applying wind to the static rig matches the look of the character moving through space. This will tell you if your lift is doing what it's suppose to.
