For most of my career I've specialized in Cloth and Hair simulation, and throughout my experience I've worked on several various projects utilizing it in many different ways. Below I highlight just a few examples of my work in both simulation setup, supervision, hair grooming, setting up shots with cloth tearing, and even a breakdown of my experience in wind development.
Simulation Setup
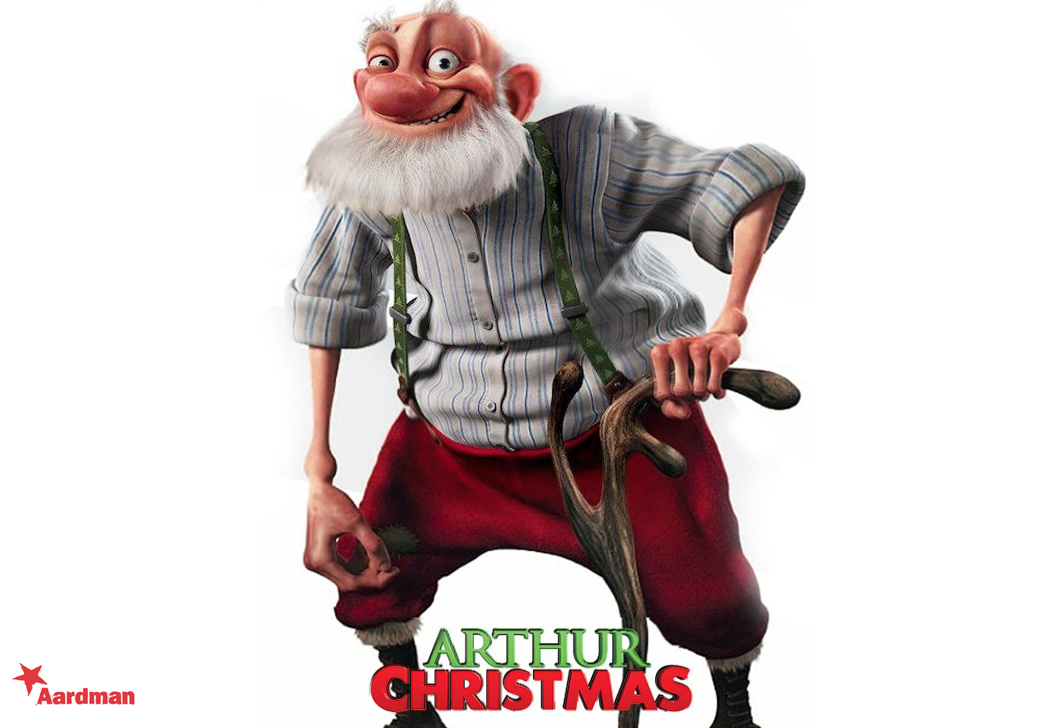
Grand Santa from "Arthur Christmas"

Grand Santa on "Arthur Christmas" was a very fun cloth rig to setup during my time at Sony. The reason he was such a fun character was his design required him to have a ton of fabric and wrinkle detail, but still be able to fit within the style of an Aardman movie. This thin old man, who still wears his clothes from when he was a younger more plump Santa, created a very interesting challenge in making his clothing feel baggy with a lot of wrinkle detail, but also making the cloth thin enough to see his frail body underneath.
I worked on both Grand Santa's casual and festive variant cloth rigs, both which produced some very interesting challenges. The casual rig had these suspenders that needed to remain tight enough to hold up his pants. To handle this I built a rest mesh rig with skinned bones that would initialize the compression and stretching of the suspenders. I used this to drive my sim and would also have a control to tighten the suspenders even more in shots if it needed it. This rig helped us get a nice clean sim/rig approach automatically without the need for artists to adjust them per shot. Below is showing just a few shots of these rigs in action.
Yesss from "Wreckit Ralph 2"
When I was Technical Animation Supervisor on Wreckit Ralph 2, I led the team involved with developing Yesss's cloth and hair setup. Above you'll see a simulation I produced to test out her rig performance. A lot went into her rig development to be able to achieve results like this. Tim Richards the cloth rigging artist and Xinmin Zhao the hair rigging artist both partnered with me to help bring Yesss's sim setups from design to implementation. Below I will explain in more detail the process we took to get her ready for the show.
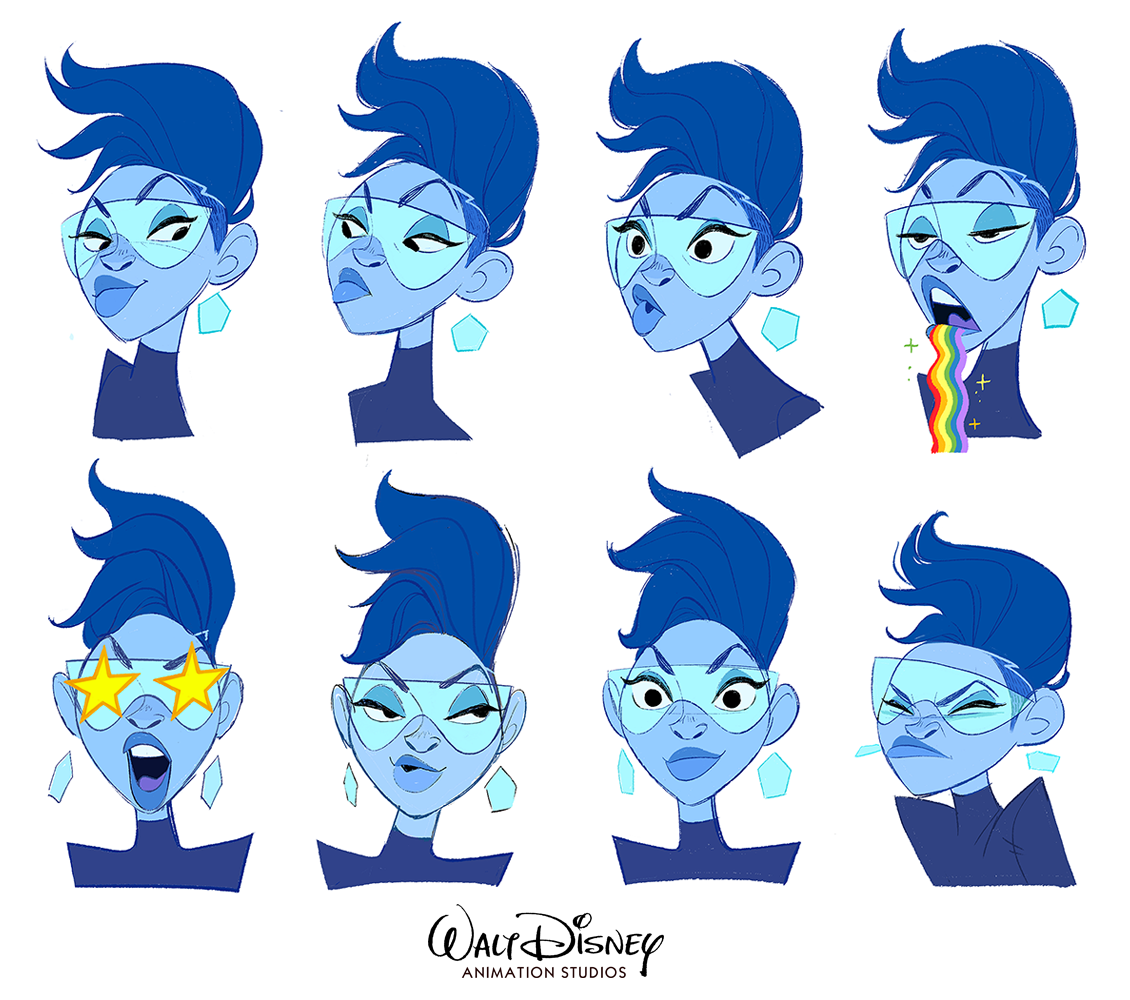
To start off we studied her art design. Look at the image below depicting her facial poses. You'll notice no matter where she turns her head, her hair silhouette keeps a consistent shape throughout. We call this the "mickey mouse ear effect". To achieve this in her hair rig, I helped build a control that would allow the Tech Anim artist to animate her target curves based on the head position. These target curves would then feed the pose of the hair while also allowing her hair to move naturally when simulating her performance.

Next if you look at the reference movie below, we really wanted Yesss's motion of her cloth to resemble Cruela De Vil's fur coat in "101 Dalmatians". Cruela's coat was animated in a way that almost felt like a character itself. The motion really helped enhance animation's performance. This was our goal to achieve similar results with Yesss on our movie.
Knowing this was going the be the look we were after in the design of her fur coat, we knew this was going to be a challenging task. How do we sim a fur coat with all those hairs and also make it easy to manage the overall shape while not making it a pain to work with? Well, we decided to implement her sim into 2 rigs. The first rig consisted of a volume which would simulate the thickness of the jacket. This rig would be what the artist would run first to get the overall motion and shape bought off on before moving onto the 2nd sim rig. This 2nd layer rig is what we used to simulate the individual hairs. The render below shows the layered rig approach which consisted of simulating cloth strips at the end of the process. The reason we chose to sim the fur using cloth and not hair was our cloth solver would produce way more accurate collisions and gave us the fidelity we were after.
Thanks to this early collaboration between both the sim setup and tech anim teams, we were able to create a very appealing character. This also highlights the type of artistic contributions that our department makes on our movies. Below I share a few shots from the film that show how well Yesss's simulation served to enhance her performance.
Lizard's Lab Coat from "The Amazing Spiderman"
On top of getting to work on Lizard man's muscle rig in "The Amazing Spiderman", I also was in charge of setting up his cloth rig for the lab coat. This lab coat was going to go through some pretty complex simulations. First the lab coat had to have the wrinkle detail and motion you would expect from this type of garment, but on top of that, it would need to be able to stretch out and tear at the seams due to the Lizard transforming from a human to a large beast. In cloth, simulating tearing is an extremely difficult task with a lot of moving parts. First you have to make sure the model can handle this type of simulation. Will your render be able to handle changing topology? Also will the cloth be thickened at render time? In our case we were able to develop these additions to be able to handle this. Speaking of tearing, this happened a lot in the movie. We see his coat tear off his body twice, and like you'll see below, he even gets riddled with bullet holes for multiple shots.
Overall working on the Lizard creature was hugely satisfying. It really pushed the boundaries for us, more then I've ever seen on any other character I've worked on. It's not every chance where you have a character that has a complex muscle and skin setup, on top of having a bullet hole, cloth tearing lab coat. Literally, I don't think it gets more complex than that! :)
Bed Sim Setup from "Frozen 2"
So we've talked a lot about character simulation on this page, but you may not realize there are also complicated simulation setups for the props in our movies. One example of this is the cloth setup I did on the bed in Frozen 2. It shows up for a handful of shots at various points in the movie. With this setup the characters would have to sim with the mattress, sheets and pillows on the bed, while also having their actual cloth garments and hair colliding with it as well. Now we could of just tried simming everything together in one scene, but for speed/iteration purposes I chose to handle this another way. My process was to build an automated system that would take the characters rigged preroll files and adjust their positions so that they don't start directly intersecting the bed. Instead their preroll would offset the characters just above the bed surface so that they would animate nicely into place at the start of the simulation. My system would then simulate the bed using the characters as colliders and export that data out. On the final step, the system would then simulate the character's cloth and hair using the bed sim data as a collider. This order of simming the bed first, then simming the characters last allowed for quicker iteration. Ideally an artist would get the bed sim approved first before moving onto the character's cloth and hair like you see in the renders below.
Hair Grooming
Hair Grooms from "Digital Domain"
During my time at Digital Domain, I had the opportunity to help design and groom 4 hair styles for a Coca-Cola Christmas print ad that involved a Mom, Dad, Daughter and Son. This ad was never released but I saved the render turntables of the grooms to show the work that was done. The inspiration behind these hair styles were suppose to resemble a family in a Norman Rockwell painting, which explains the vintage look. These grooms were built in 3d Studio Max using the Shave and Haircut Plugin.
Wind Development
Elsa Wind Setup on "Frozen 2"

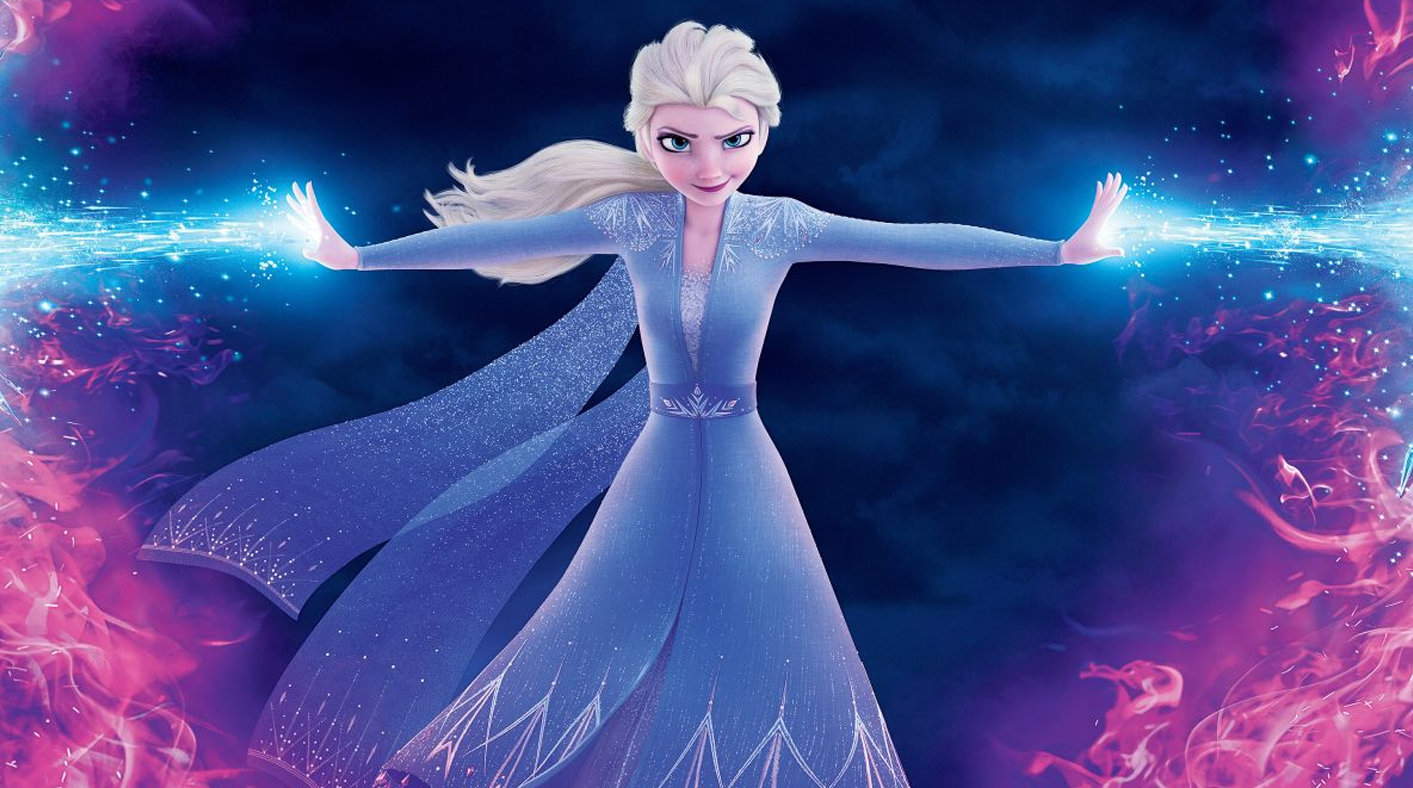
On Frozen 2 I was given the task of developing a wind system that would help with Elsa's big wind sequences in two sections of the film. The biggest being her getting engulfed by the wind spirit and pushing away a tornado surrounding her. I also had the chance to develop an ethereal wind for her big musical number when she appears in her new dress. The render below was one of my shots that show this effect. We really wanted the simulation to feel dynamic and help enhance her performance as she belted out her song.
Throughout our sim testing we found that in most cases the default wind field would produce some pretty amazing results, but for cloth that is tight fitting, we never could really get any since of motion or wrinkle fidelity as wind is traveling through it in sim. That's when we developed a post wind system that would allow a noise deformer to mimic the effect of ripples and billows traveling through the cloth based on the wind direction. If you look at the tests below, this really produced some amazing results. The post deformer offsets the mesh based on normal direction and doesn't introduce self IPs with the underlying mesh. This allowed for us to apply this effect procedurally to any character and required almost no setup or cleanup.
The results of our sim wind field and our new post wind effect can be seen on full display in the shots below. Every single shot of Elsa during this sequence is mine. It was a super fun sequence to get to work on and I hope you enjoy watching it as well!
